Make your own: fruity ice-cream
by Abbie-Clare Vidler, LiveLighter Project Officer
- June 29, 2020
- Leave a comment
Looking for a fun new project? Want to know exactly what's in your food? Welcome to the MYO series, where we look at how to prepare some of your favourite foods from scratch.
Making your own healthy ice-cream or popsicles at home is a great way to make use of any fruit still sitting in your fruit bowl or hidden at the back of your freezer. And you’ll be surprised at how easy it is to whip up a tasty treat that will knock the socks off those expensive alternatives you find in the freezer aisle!
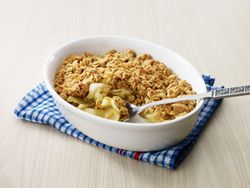
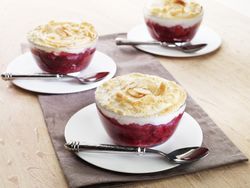
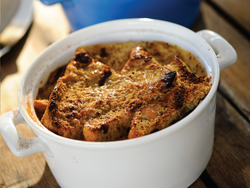
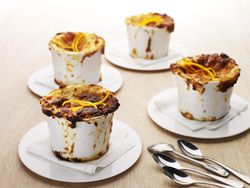
As the weather cools down, we recommend pairing your fruity ice-cream with one of our delicious winter warmers, like apple crumble, bread and butter pudding, orange semolina puddings or berry and rhubarb meringue pots.
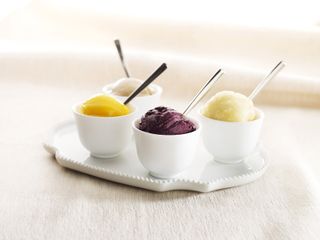
FRUITY ‘ICE-CREAM’
Equipment needed
- Food processor
- Containers or zip lock bags
Ingredients
- Frozen, tinned, bottled or fresh fruit
- Lime or lemon juice; fresh or long-life (optional)
- Reduced-fat milk (optional)
Variations
We love the following variations, but feel free to let your creativity run wild!
- 3 bananas, add 1 ½ tablespoons of cocoa for a chocolatey taste
- 1 cup blueberries, 1 banana and 2 tablespoons of reduced-fat milk
- 1 mango and the juice of ½ a lime
- Tinned pineapple
What to do
- If you’re using fresh, tinned or bottled fruit, you’ll need to do some prep the night before:
- Tinned or bottled fruit: Drain off any liquid, place the fruit into a zip lock bag or container and pop in the freezer.
- Fresh fruit: Roughly chop fresh fruit into pieces and pop these in a container or zip lock bag and into the freezer.
- Place the frozen fruit in the bowl of a food processor with any other ingredients you are including and process until the mixture becomes granular.
- Scrape down the sides of bowl with a spatula and process again. Repeat 4-5 times until the fruit mixture has a smooth, thick and creamy texture.
- Spoon into bowls and voila, your fruity treat is ready to eat!
- Your fruity ‘ice-cream’ can be kept frozen in an airtight container; you’ll just need to remove it from the freezer 30 minutes before serving to allow it to soften.
No food processor? No problem!
If you don’t have a food processor, or the one you have is struggling to get through the frozen fruit, fruity popsicles are another easy (and instagrammable) icy treat.
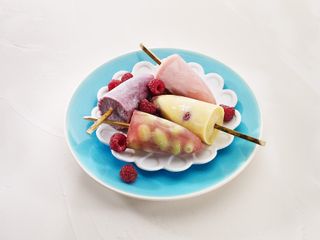
FRUITY POPSICLES
Equipment needed
- Plastic cups or popsicle moulds
- Popsicle sticks
Ingredients
- Fresh, frozen, tinned or bottled fruit
- Plain or flavoured reduced-fat yoghurt OR 100% fruit juice
- Fresh herbs (optional)
The variations we love
- Watermelon, reduced-fat vanilla yoghurt and mint leaves
- Blueberries and reduced-fat vanilla yoghurt
- Seedless grapes and 100% apple and blackcurrant juice
- Mango, banana, reduced-fat mango yoghurt and fresh or frozen raspberries
What to do
Yoghurt-based popsicles
- Blend or mash fruit and herbs (if using) with your preferred yoghurt
- Pour into plastic cups or popsicle moulds.
- For stripes of colour half fill cups or moulds with one fruit and yoghurt blend, freeze for at least 4 hours and then fill with a different fruit and yoghurt blend.
- Secure lids on moulds or insert popsicle sticks and freeze for 4-6 hours or overnight until solid.
- Stand at room temperature for a few minutes before removing from the mould.
Juice-based popsicles
- Chop fruit into small pieces or leave smaller fruits such as grapes and blueberries whole.
- Divide fruit between plastic cups or popsicle moulds.
- Distribute juice evenly over the fruit.
- For stripes of colour half fill cups or moulds with one fruit and juice, freeze for at least 4 hours and then fill with a different type of fruit and juice.
- Secure lids on moulds or insert popsicle sticks and freeze for 4-6 hours or overnight until solid.
- Stand at room temperature for a few minutes before removing from the mould.